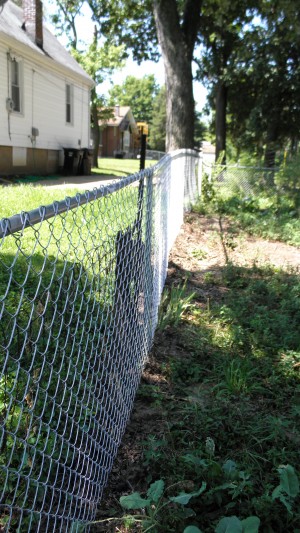
 Some times in life we have to do things we don’t necessarily want to do. You get thrown curve balls and life gives ya some challenges. The curve ball we were thrown this summer came from our neighbor. There is no need to get into the details of that ordeal, but suffice it to say that it was in our best interests to build a better fence… To tweak a Robert Frost quote, “Better fences, make better neighbors.” We are looking at this curve ball as a blessing. On our homestead we really try to find the rainbows in the storm, so to speak. We also always try to learn something. So this project is a perfect UnSchooling project! This post isn’t a “How To” or “DIY” post. It is more a post about “Our Journey”. So, sit back and enjoy the crazy adventure!
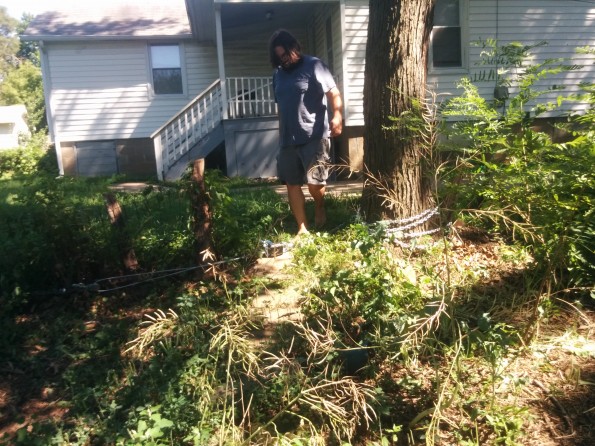 The first thing we had to do was clear the fence line of all the big stumps, trees, weeds and the broken rusty fence that needed to be replace. Tom used a come-a-long to help with yanking all that out. The come-a-long really made this chore fast and easy!
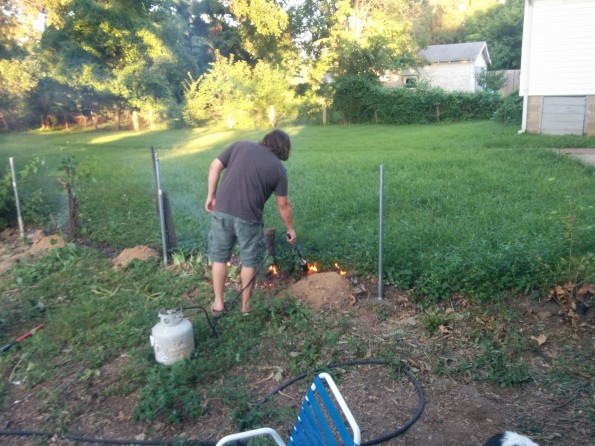 After all the big debris was cleared, Tom busted out his new toy for clearing the weeds and other mess that grows along the fence line. Tom loves his propane torch! And I can’t blame him. Fire can be a lot of fun when used properly!
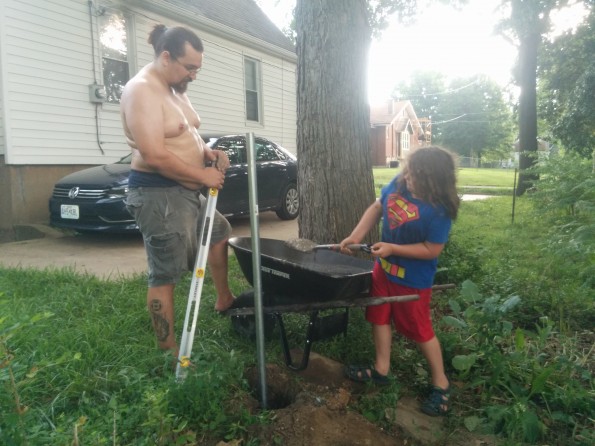 The next step was digging the holes for the post. We did this in sections. Day 1 we dug 5 holes and filled them with the concrete. Stoney really enjoyed helping with mixing the concrete and helping shovel it into the wholes. On this day we got an unexpected storm so we were dealing with an exciting game of Beat the Rain! On Day 2 we all jumped into high gear and dug and filled the last 5 holes. We also got the holes filled with concrete and poles inserted and straight.
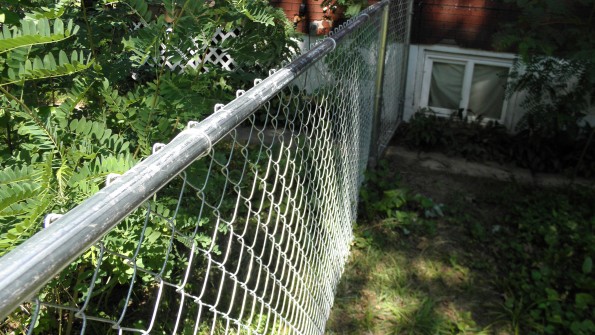 After the cement had set for 24 hours we started stretching the fence. I am convinced that you never have enough fingers to stretch and pull and yank and then place the nuts and bolts. It was a chore but we did get it all stretched in one evening. Pretty big accomplishment, I thought.
 So one of the challenges we had were gates. We went ahead and tried to take a short cut with just buying a gate, but it didn’t work out how we had hoped. Because of the side walk and the house, we had to move the poles farther apart than we had originally planned. No big deal, except the short cut had actually caused us more time spent in finishing the fenced in yard. We had to take the gate back and purchase items to build a gate.
 So since we look at every hurdle as a learning experience, Samari, actually, took on the gate challenge. With Tom’s assistance, she cut the poles, double checked measurements, attached the hardware to the gate and hung the gate with Tom’s guidance and help. She did a fantastic job! And now, there is a bit of a challenge for our furry and feathered critters to escape.
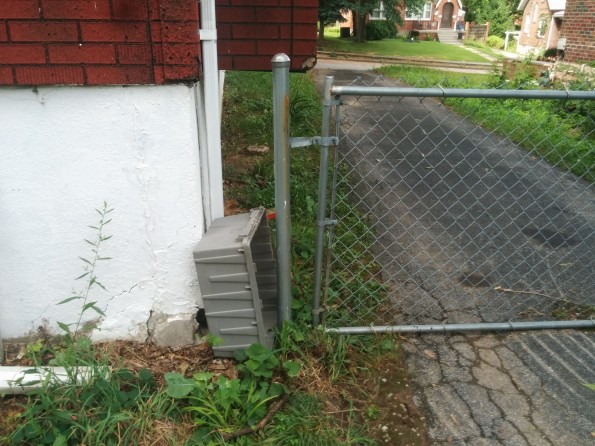 The next gate hurdle we had was on the drive way side. The gate was here when we bought the property so we didn’t have to spend money on making the gate. But as you can see, there were some issues with this side and we had to get creative. So first we had to come up with an idea to block off from the house to the pole. Then we also had to close the gap between the pole and the gate. The gate also scraped the ground when you opened and closed the gate. So some minor issues really. The scraping of the gate was something we had to use our heads to figure out. We had to figure out which ways to point the hinges in order to pull the weight of the gate upwards so it didn’t scrape. The gate is pretty long so it was a bunch of lifting and turning and maneuvering the hinges in order to get it the right height. But after about 10 minutes, we had it figured out. (I didn’t think 10 minutes was too bad to figure it out, personally).
 So to close the gap between the gate and the pole we decided to attach another terminal post to the already existing post. We used a step drill bit to make the holes in the poles and then we bolted the new pole to the already existing pole. One problem solved! We decided to just stretch a piece of fence from the pole to the house and drill into the concrete to hold the fence in place. This part cost more money than we would have liked. We had to buy a special bit to drill into the concrete and then we had to buy the concrete anchor bolts to hold the fence in place. The real kicker was when we had to buy the washes to go around the bolts to hold the fence into place. WE ONLY NEEDED LIKE 4-6 (just in case we lost one) The washers only came in 75 count at the hardware store for the size that we really needed. All well, I know we will find other places to use them over the coming years, as long as we don’t lose them in the mean time.
Even though we weren’t expecting to put in a fence at this time, we are finding some nice benefits with it. 1- It was a great UnSchooling project for the kids. 2- Even though our dogs are never outside with out us, if we have to run inside for a second, we don’t have to wait for them to get inside, just to come right back out. 3- It keeps the neighborhood riff raff out. From the trespassing of the neighbors lawn care guy (who apparently doesn’t know the difference between grass and food) and the trash that was always blowing into our yard… those issues are brought down quite a bit. And 4- When we are outside in the evening and it is starting to get dark, we can sit a little more relaxed because the dogs will have a harder time roaming out to the front yard, now that the gates were up. We were always calling them back (and funny enough, they were usually sitting under our chair or in a shadow, so we didn’t realize they were right with us anyway.) We could have looked at this as a huge pain in the butt and taking funds that we didn’t budget for. But instead we are enjoying the blessings as they happen.

0 comments on “Building Fences”Add yours →